Starting a blog website with Gatsby and Prismic. Part: Three


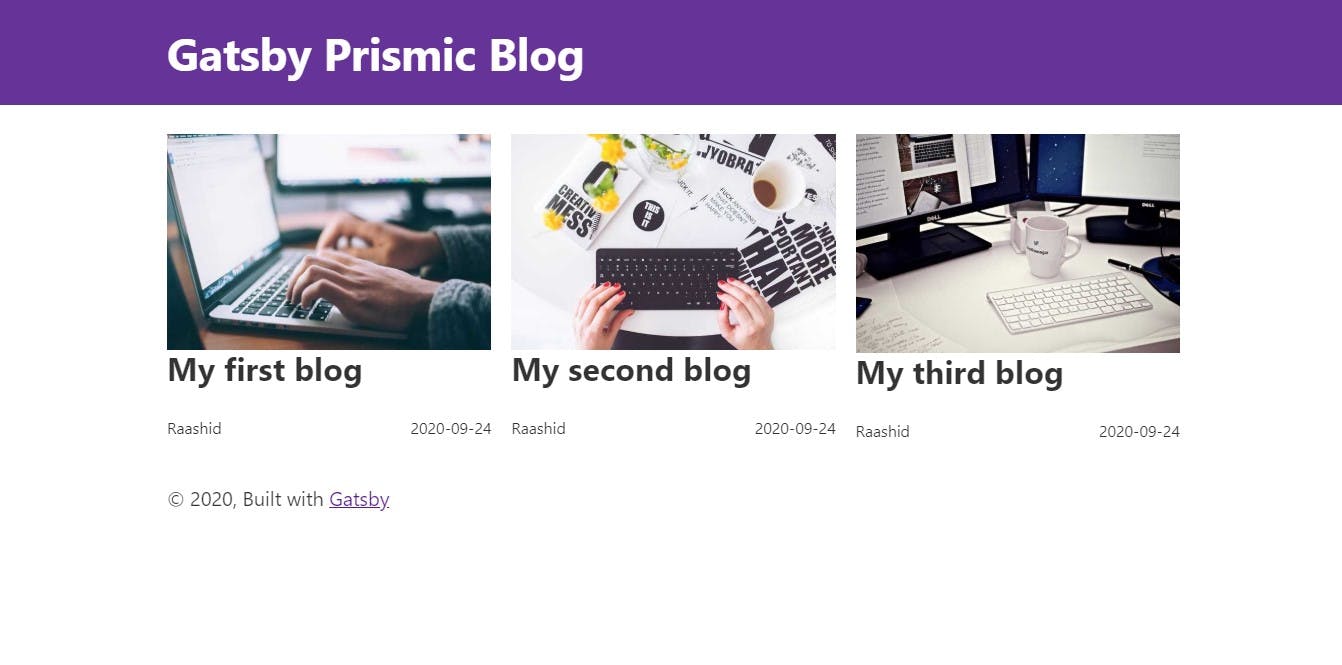
This is a three-part series of building a blog website with gatsby and prismic. If you haven't checked part one and part two you can read Part: One here and Part: Two here. In part one we set up our headless CMS with Prismic. In part two we successfully fetched data from Prismic and displayed on our gatsby website. This is what we have from Part: Two.
In this part, we are going to create the page dynamically using gatsby for each of our blog page and Set up our about us page. So let's get started.
Creating pages Dynamically.
With our current website, the next step will be opening each blog when we click on any of the blog cards we have. We can do manually by going into src/pages and create each. This might work if you have 3 blogs but what if you have 100 articles that will be a lot of repeated code and that's no fun. So what we will do here is tell gatsby to generate page out of a template page for each of our blogs. We will use the gatsby create pages API.
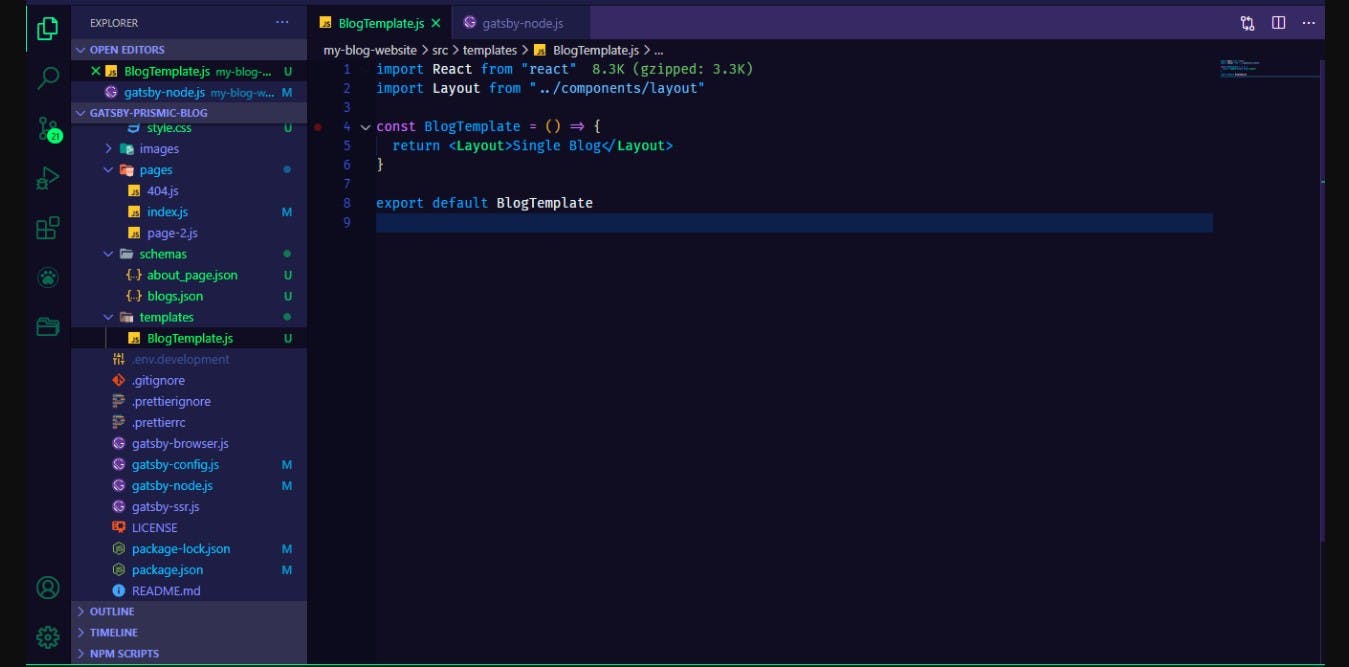
But first, let's create a template folder in our src folder and inside templates folder create a BlogTemplate.js. For now, we will create a functional component in BlogTemplate and render a div with text "Single Blog" inside it. This will look something like this
Now we will head to gatsby-node.js file.
First, we need to get path so that node can look into our folder for that require path
const path = require("path") After this, we will use create page functions which will query for our blogs and create pages based on the template we provide.
exports.createPages = async ({ graphql, actions }) => {

  const { createPage } = actions

  const result = await graphql(`

    {

      blogs: allPrismicBlogs {

        nodes {

          uid

        }

      }

    }

  `)


  result.data.blogs.nodes.forEach(item => {

    createPage({

      path: `/blogs/${item.uid}`,

      component: path.resolve(`src/templates/BlogTemplate.js`),

      context: {

        slug: item.uid,

      },

    })

  })

}
What we are doing here is querying for our blog and saving that invariable result. From that result, we are doing a forEach function on each blog to createPage with 3 values.
- path - this is our slug remember we created this when we were creating our content types. In our case, it will be /blogs/uid.
- component - this is just the path for our BlogTemplate.js
- context - this is important we will need this in our BlogTemplate.js to query specific blog.
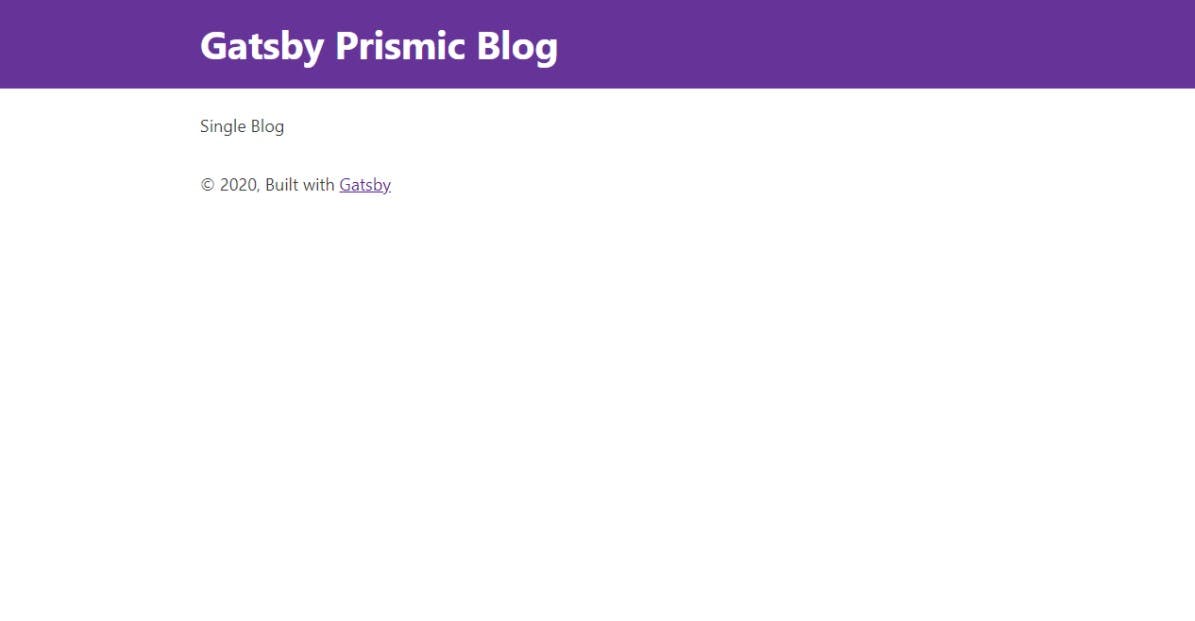
Once you run gatsby develop again and if you go to http://localhost:8000/blogs/my-first-blog
you will see a single blog page. Of course, this alone will not show all your data in it but its a good start.
Creating Template for each of our blog pages.
If you go back to http://localhost:8000/___graphql you will see a field prismicBlog. That is to query a single blog. This is what we are going to use. Remember we passed a context from createPages the slug, that is what we are going to use to query a single blog.
export const query = graphql`

  query GetBlog($slug: String!) {

    prismicBlogs(uid: { eq: $slug }) {

      data {

        article {

          text

        }

        author {

          text

        }

        image {

          localFile {

            childImageSharp {

              fluid {

                ...GatsbyImageSharpFluid

              }

            }

          }

        }

        title {

          text

        }

      }

    }

  }

`
What we are doing here is using page query to query a single blog data. $slug is the same thing we passed onto context while creating pages. Now that we have our data we can display on each of our blog pages.
import React from "react"

import { graphql } from "gatsby"

import Layout from "../components/layout"

import Image from "gatsby-image"


const BlogTemplate = ({ data }) => {

  return (

    <Layout>

      <article className="singleBlog">

        <h1 className="singleBlog-title">

          {data.prismicBlogs.data.title.text}

        </h1>


        <span>By: {data.prismicBlogs.data.author.text}</span>

        <Image

          fluid={data.prismicBlogs.data.image.localFile.childImageSharp.fluid}

        />

        <p>{data.prismicBlogs.data.article.text}</p>

      </article>

    </Layout>

  )

}


export default BlogTemplate


export const query = graphql`

  query GetBlog($slug: String!) {

    prismicBlogs(uid: { eq: $slug }) {

      data {

        article {

          text

	  raw

        }

        author {

          text

        }

        image {

          localFile {

            childImageSharp {

              fluid {

                ...GatsbyImageSharpFluid

              }

            }

          }

        }

        title {

          text

        }

      }

    }

  }

`
That's it we have our single blog page set up. And if you look at http://localhost:8000/blogs/my-first-blog what you see is s single blog page.
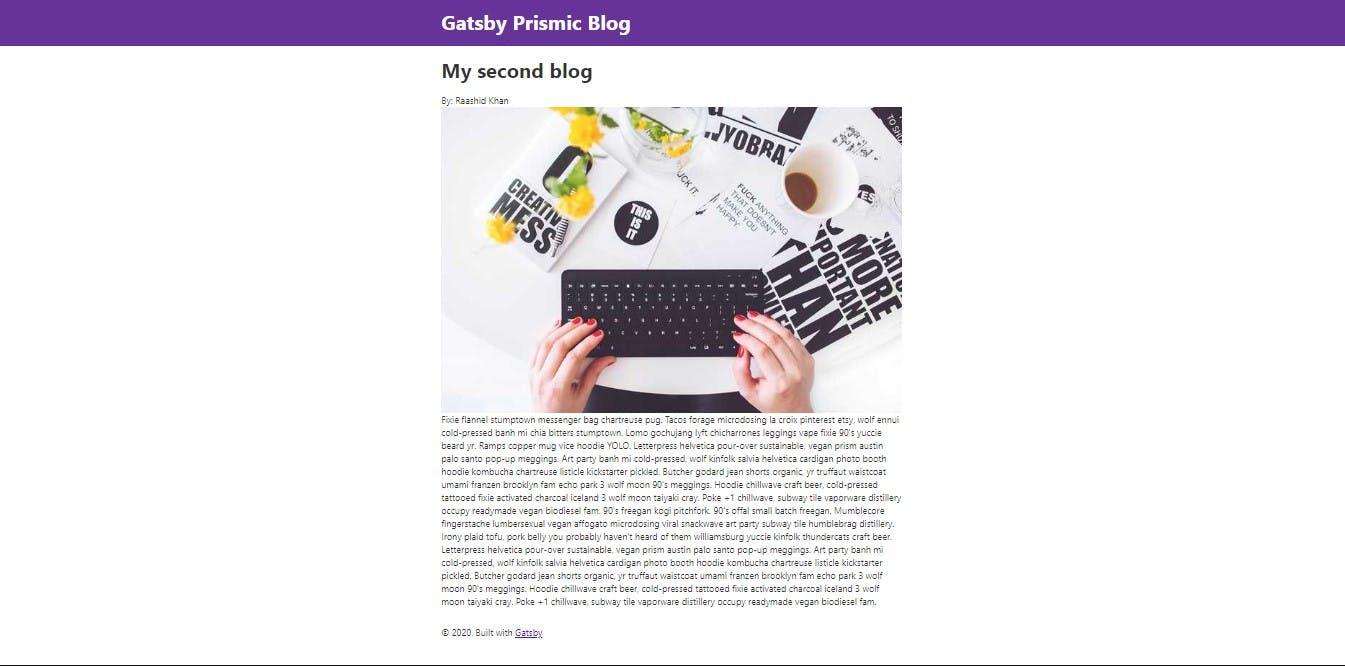
Not the prettiest but you have a functional blog read to use. You can definitely add some styling to make this blog look great. Notice how all of our article body is jumbled up in one paragraph that's because what we querying is a giant string from Prismic. In order to model our content as we set in our prismic data, we will have to parse that data to HTML. For that, we are going to use prismic-reactjs So we need to install this package. Stop the development server and run
npm install prismic-reactjs --save
Now we have to import this to our BlogTemplate.js file.
import { RichText } from "prismic-reactjs" and we have to render our data in RichText component like this
<RichText render={data.prismicBlogs.data.article.raw} /> Our final BlogTemplate.js file will be
import React from "react"

import { graphql } from "gatsby"

import Layout from "../components/layout"

import Image from "gatsby-image"

import { RichText } from "prismic-reactjs"


const BlogTemplate = ({ data }) => {

  return (

    <Layout>

      <article className="singleBlog">

        <h1 className="singleBlog-title">

          {data.prismicBlogs.data.title.text}

        </h1>


        <span>By: {data.prismicBlogs.data.author.text}</span>

        <Image

          fluid={data.prismicBlogs.data.image.localFile.childImageSharp.fluid}

        />

        <RichText render={data.prismicBlogs.data.article.raw} />

      </article>

    </Layout>

  )

}


export default BlogTemplate


export const query = graphql`

  query GetBlog($slug: String!) {

    prismicBlogs(uid: { eq: $slug }) {

      data {

        article {

          text

          raw

        }

        author {

          text

        }

        image {

          localFile {

            childImageSharp {

              fluid {

                ...GatsbyImageSharpFluid

              }

            }

          }

        }

        title {

          text

        }

      }

    }

  }

`
and our final page will be
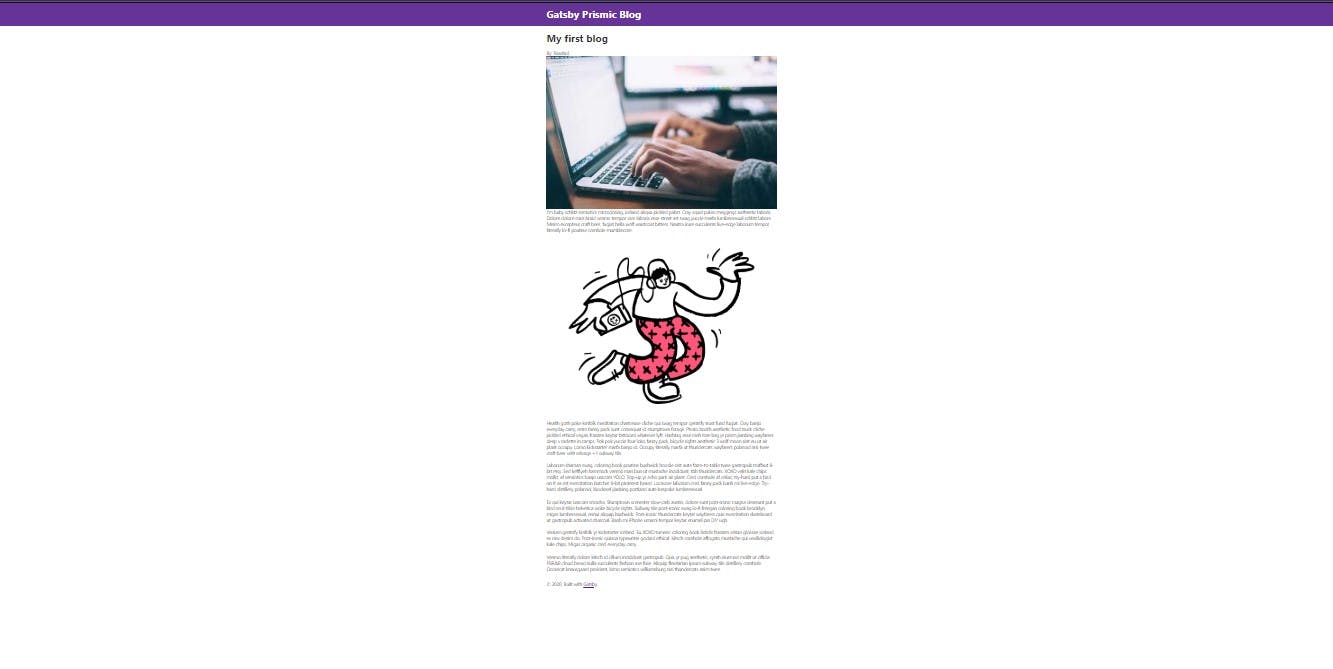
I even added an image in between our post so that you can see we are formatting our data correctly.
Next step will be to add a link to our blog card component so that we don't have to type the url if we want to see individual blogs. We are going to add a link to these pages from our homepage. What we have to do is just add a Link component with a dynamic path to our Blog.js component. So let go to Blog.js and import Link Component.
import { Link } from "gatsby" Now we can use this component with a dynamic path and the path will be:
{`blogs/${blog.uid}`} We have uid available for us from our query. So now our Blog.js will be like this
import React from "react"

import { useStaticQuery, graphql, Link } from "gatsby"

import Image from "gatsby-image"


const Blog = () => {

  const data = useStaticQuery(graphql`

    {

      allPrismicBlogs(sort: { fields: id, order: DESC }) {

        nodes {

          uid

          date: first_publication_date(formatString: "YYYY-MM-DD")

          data {

            author {

              text

            }

            image {

              localFile {

                childImageSharp {

                  fluid {

                    ...GatsbyImageSharpFluid

                  }

                }

              }

            }

            title {

              text

            }

          }

        }

      }

    }

  `)


  return (

    <div className="blogList">

      {data.allPrismicBlogs.nodes.map((blog, index) => {

        return (

          <article className="blogCard">

            <Image fluid={blog.data.image.localFile.childImageSharp.fluid} />

            <h2 className="blogTitle">{blog.data.title.text}</h2>

            <div className="blogFooter">

              <span className="blogAuthor">{blog.data.author.text}</span>

              <span className="blogDate">{blog.date}</span>

            </div>

            <Link to={`blogs/${blog.uid}`}>Read More</Link>

          </article>

        )

      })}

    </div>

  )

}


export default Blog
and the final result is
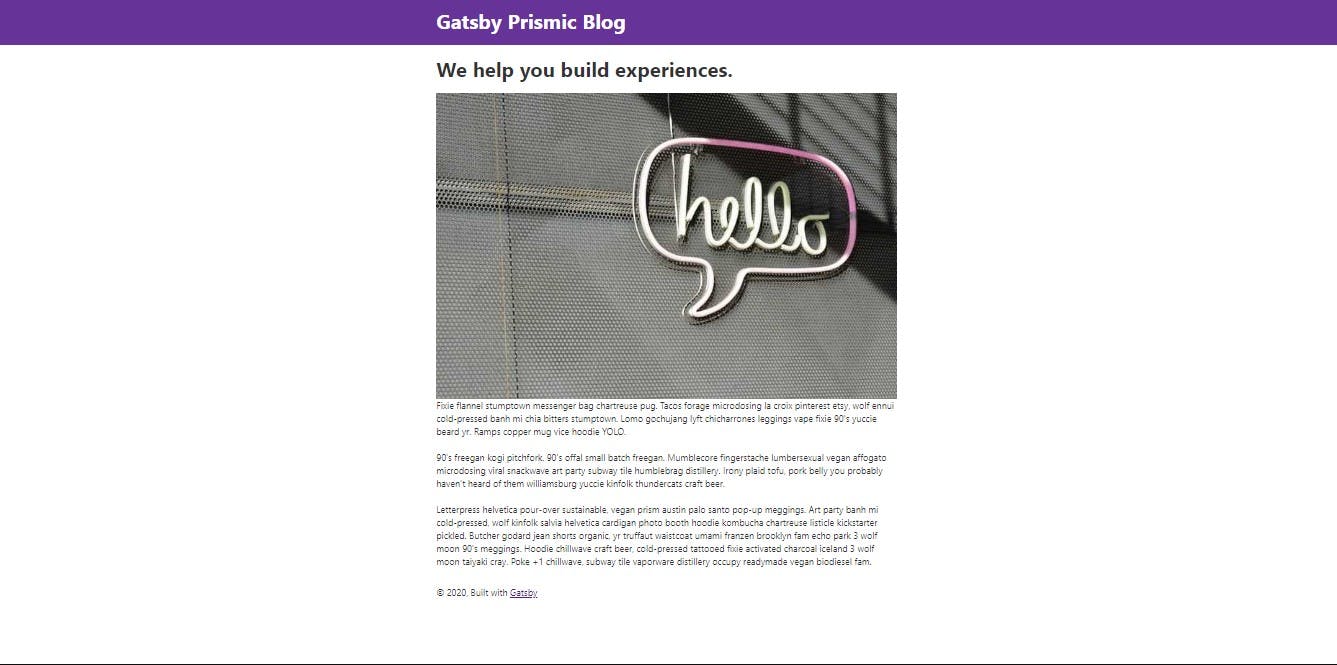
Creating About Page from a single type of content.
First, we need to create an about.js in our pages folder and there we will create a functional component About. Next, we have to query our about page data from prismic and finally, we will display our data using JSX in gatsby.
we are going to use page query and our query will be
export const query = graphql`

  {

    allPrismicAboutPage {

      nodes {

        data {

          about_us {

            text

						raw

          }

          header_title {

            text

          }

          header_image {

            localFile {

              childImageSharp {

                fluid {

                  ...GatsbyImageSharpFluid

                }

              }

            }

          }

        }

      }

    }

  }

`
Now with a query, we will data object for us to use in our about the component. We pass that data object and write some JSX.
import React from "react"

import Layout from "../components/layout"

import { graphql } from "gatsby"

import Image from "gatsby-image"

import { RichText } from "prismic-reactjs"

const about = ({ data }) => {

  return (

    <Layout>

      <div className="aboutPage">

        <h1 className="aboutUs-title">

          {data.allPrismicAboutPage.nodes[0].data.header_title.text}

        </h1>

        <Image

          fluid={

            data.allPrismicAboutPage.nodes[0].data.header_image.localFile

              .childImageSharp.fluid

          }

        />

        <RichText

          render={data.allPrismicAboutPage.nodes[0].data.about_us.raw}

        />

      </div>

    </Layout>

  )

}

export const query = graphql`

  {

    allPrismicAboutPage {

      nodes {

        data {

          about_us {

            text

            raw

          }

          header_title {

            text

          }

          header_image {

            localFile {

              childImageSharp {

                fluid {

                  ...GatsbyImageSharpFluid

                }

              }

            }

          }

        }

      }

    }

  }

`

export default about
That's it you have you're about us page ready. Next, we will add a link to our homepage so we can navigate to about us page. In our index.js import Link component from gatsby and add it to our component. Our final index.js is
import React from "react"

import { Link } from "gatsby"


import Layout from "../components/layout"

import Blog from "../components/Blog"

import SEO from "../components/seo"


const IndexPage = () => (

  <Layout>

    <SEO title="Home" />

    <Blog></Blog>

    <Link to="/about">About Us</Link>

  </Layout>

)


export default IndexPage
and our about page is
That's it folks if you completed this whole series thank you for your time hope I helped someone. From here you can read more about the advance features of prismic like slices or localization if you want a multilingual website or you could add styled-components to make this website awesome. I recommend checking Prismic docs for more information.
Resources:
https://www.gatsbyjs.com/docs/
Again Thank you and see you next time.